The CDPRO2 has knocked me flat!
Build Your Own Macho CDP
So, I’ve DIYed my speakers, amp, preamp… what remains is a CDP right? This plus the fact that the current limiting factor in my system is my “ancient as dinosaur CD63”. And which CDP but not the CDPRO2?
Building this CDP turned out to be quite easy! But let me list down the 3 most difficult things.
1. Making the decision to purchase the CDP kit.
For the money, we can buy quite a number of CDPs in the market so it’s tough to justify spending so much dough on this. Plus the fact that the Euros have appreciated by quite a fair amount, it doesn’t make the decision any easier to make. But you can take comfort in the fact that this is one hell of a transport! I have modified some CDPs costing RM5k but uses… way inferior transport. In short, you really need to spend a lot of moolah to get transport of this quality but with DIY, you can save, save, save. But first, you need to spend, spend, spend. And this is always a difficult decision to make for me. But I received help in some way. I actually asked Waily to get this kit from AHF Art Audio in Singapore. But deep inside, I haven’t really made my mind yet, thinking Waily will take his own sweet time, but suddenly he called me to inform that he has already bought the unit! Talking about speed! Waily, you don’t know about this right? But a BIGGGGG thanks to you!
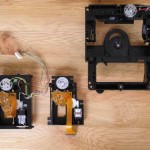
2. Terminating those darn tiny connectors
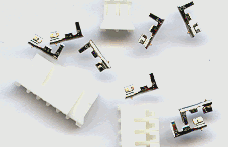
Yeah, see these tiny connectors? Damn! They are hard to terminate. Nico’s website has lots of information but I think it’s meant for the average diyer. For the below average diyer like me, this is tough! I “destroyed” a few of these connectors before finally making good. The thing is, you usually get a hang of doing this… when you are doing your last termination. Sigh…
3. Powering up…
Okay, maybe I shouldn’t be refered as the “intrepid solder slinger” anymore. I was quite worried about powering up. You see, I have “digit-phobia”. I’m scared of working on digital circuits. For some reasons, even the simplest digital circuit, I have
a natural propensity to screw it up. And I have screwed up a few! But I’m okay with analog circuits, even though analog is pronounced ANAL-LOG. To me, digital is anal. So you understand my apprehension to switch it on? But all great men must make decisions like this so… but it didn’t work. The lens bopped up and down non-stop. Huh? After consulting some “guru”s, shit! I found out I didn’t even power the micro-controller. After giving its 5V, ah, it’s better now, but now we come to the next problem.
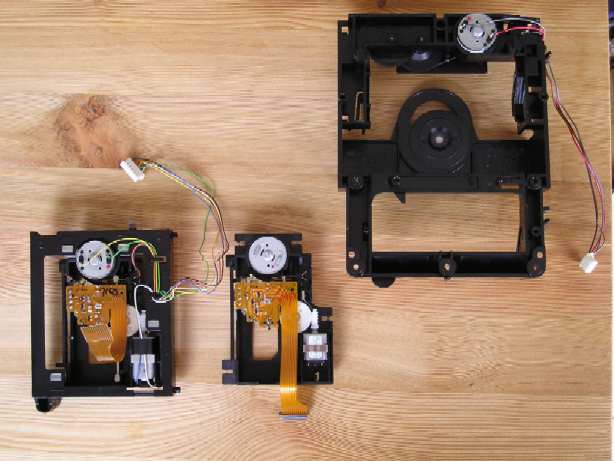
4. How the hell do you fit on the clamp?
If you have built the CDPRO2 before, you will laugh at this idiot! Yes! I spent an eternity trying to figure this out! I kept on fitting the clamp upside down and each time when the motor spins, the CD floats up and down, like a flying saucer. Nothing extra-terrestial mind you but when I finally figured this out, I knocked myself flat. Stupid, stupid, stupid.
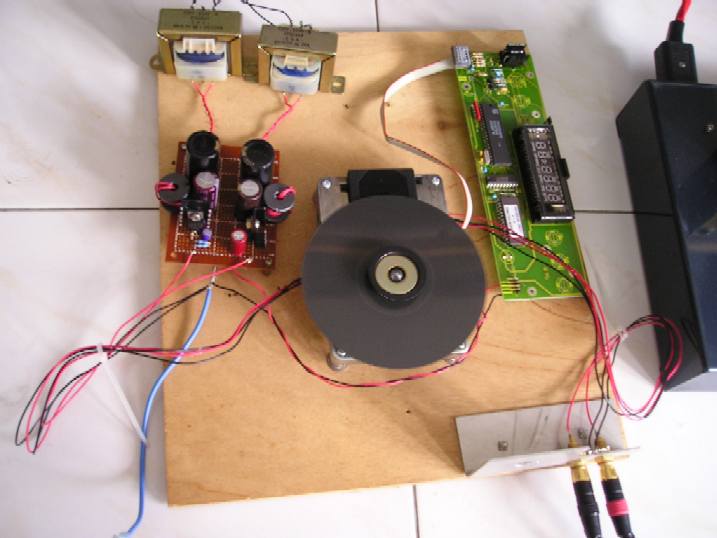
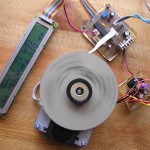
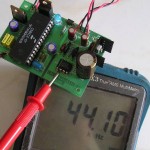
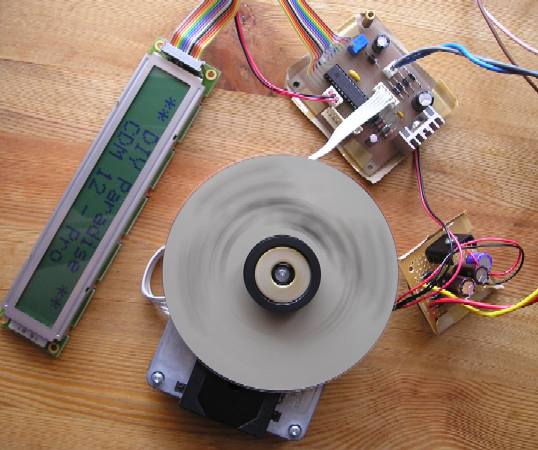
Ha! Believe it or not! Those are the problems I faced! The power supply is easy to build. I built the one recommended by the website. But note that the LED display is not turned on. I got lazy and decided not to build the negative supply for the display. So I intend to just use the remote control. No display at all! Like a turntable. And that black thing spinning on the disc? It’s from 5″ floppy disks from the dinosaur age. When I’m done with a wooden chassis, it will look like a turntable. I hope…
Err, apologies for the unsightly construction. It’s a prototype mind you. I can’t be sure it works until I know it works right? Remember “digit-phobia”? So I built this on plywood. Err, the extra long wires is so that when I FINALLY do up a proper chassis, I won’t have the problem of “too short wire”. Another side-effect of digit-phobia.
OK, enough talk about the prototyping, how’s the sound? First of all, we are refering to the internal DAC. It’s… a very basic DAC. The sonics is nothing to shout about but you can hear the potential of this transport immediately. I could hear better detail and better separation of voices and instruments. Wait till I build my non-os dac. And the best thing is,
I2S signal is already available… Ha ha ha ha…
After a few hours, I just couldn’t stand it anymore. The built-in DAC of the CDPRO2 sounds just like normal DACs, meaning it has that typical “digital sound”. That’s the consequence of listening too long to your non-oversampling DAC! Once you get hooked to the non-os sound, you just can’t turn back to conventional DACs anymore.
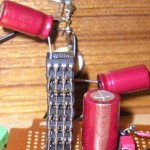
So, very quickly, I whipped up another non-os dac, based on the TDA1543 again. It’s the same circuit as the RM20 DAC. So I’m back to “intrepid mode” again! And this time it’s easier as I2S signal is readily available. But I still need to make those darn connectors… (when I was done, I destroyed more connectors! I used up ALL my connectors, including those meant for the display supply. DIYers Asylum, here I come…)
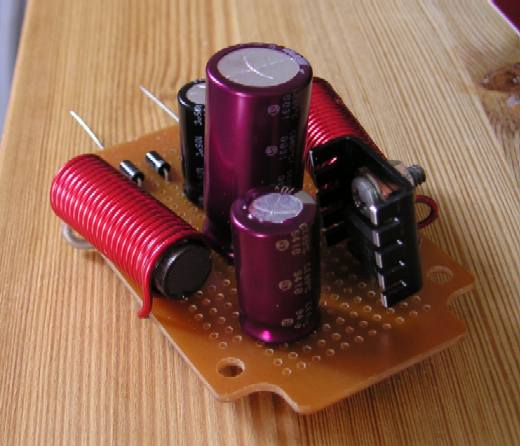
As usual, built the power supply first. I found some ferrite inductors salvaged from some junk equipment. Hey, might as well put it to good use. Also, it looks sooooo macho.
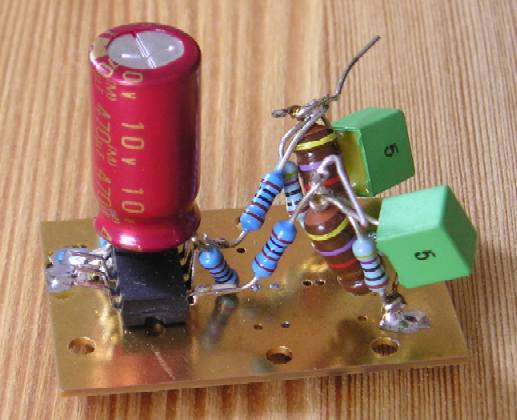
Aha! Here’s the DAC! Built “deadbug” style. The huge groundplane also functions as heatsink for the super hot TDA1543. The 3 parallel components form the parallel resonant filter. I know I can’t listen to this DAC without this resonant circuit but I still see a lot of folks on the Internet complaining that this DAC is dark sounding. Let me shine you some light: Install just these handful of components and you won’t be in the “dark” anymore. Serious!
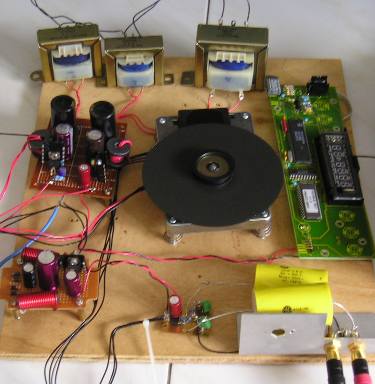
Finito! Compared to previously, there’s now an additional power trans for the DAC. The huge one at the back. Yeah, I’ll eventually replace those tiny ones beside it with their bigger brothers too. In front, is the non-os dac power supply and the dac itself. Then 2 huge honking 10uF GE plastic cap for DC blocking duties. Now you understand why I built it on plywood? And I’m already running out of space!
I hear INCREDIBLE separation. Voices, instruments are distinct and individual and you can follow them as they go through the motion. I mean, when they get loud, they don’t “mesh” together like before. I get lower bass too! I used to think that my Hammers is the bass limit but it isn’t! It’s the Marantz! (Adios to subwoofer project.) Then I’m hearing detail I never knew existed! On the beginning of one track, I’m suprised to find the singer breath into the mike before singing. I never knew this before! I never heard this before, damnit! And some of the little spatial cues are remarkable. For example, on Jennifer Warne’s “The Hunter”, after the accordion intro on “Lights of Lousianne”, the seagull is like out of this room! And of course, the very nature of non-os is there, for all to hear. Very natural, very real. (Adios to turntable project.)
All in all, I feel that the CDPRO2 transport has “transported” the performers to my room! But there’s definitely room for improvement, though the bar has been raised considerably. My brief experience with TDA1541 (but not through the CDPRO2) showed that this DAC chip has even more potential. It has a GLORIOUS, LUMINOUS midrange. But this guy needs 3 power supply and has such low output, I will need another gain stage (and more transformer, more power supply… oh my.) I mean, at present, the simplicity of the system is very very attractive. CDPRO2 – TDA1543 DAC – Etude “12B4” Preamp – Simple EL84. There’s only 3 gain stages between DAC and speakers! But I’m getting ahead of myself here. Let’s enjoy the music for now.
And build a proper chassis.


