Stepped Attenuators are Soooo Muchhhh Funnnn…
Stepped Attenuators are Sooooo Muchhhhhh Funnnnn
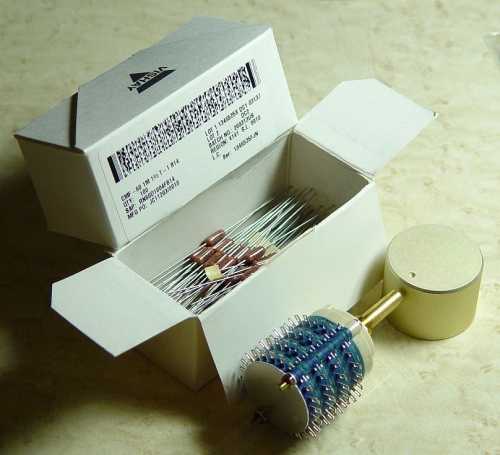
Oh yeah… Thanks to the ultra-resourceful guys from www.my3c.net, now you could get a stepped attenuator yourself for dirt cheap! And they come with Dale RN60D 1% precision resistors as well… which if you were to purchase these resistors separately, would cost more than what you paid for this kit. Unbelievable!
To top it off, there’s even a website showing you, step-by-step, how to build it up. This beats some kit suppliers asking for USD20 for their manuals. Bah! By the way, link to purchasing the attenuator is somewhere near the bottom of that page.
Unfortunately, when I bought their kit, they only had the 10kohm version then. They now have 100kohm version as well, which is great for tube gear! But I’m left with my own 10kohm version, so I bought some metal film resistors (92 pieces of them to be exact) and proceeded to build my own 100kohm stepped, albeit without the “glamour” of boutique Dale resistors.
And so I bought the resistors. But didn’t touch them till a week later. How long a week is when you are tied up with less important issues like your day job… Then Diyer Steven paid a visit. When I was relating my “grand” plans with my stepped attenuator (as usual, so full of myself), Steven quickly told me that he has a lot of problem fitting his attenuator into his chassis. You see, if you built up the attenuator as described on the website, you’ll end up with a stack which is 6cm in height, which in most cases, most probably can’t fit into your existing preamp chassis. Imagine after toiling for 3 hours soldering this behemonth and you can’t fit it into your chassis?
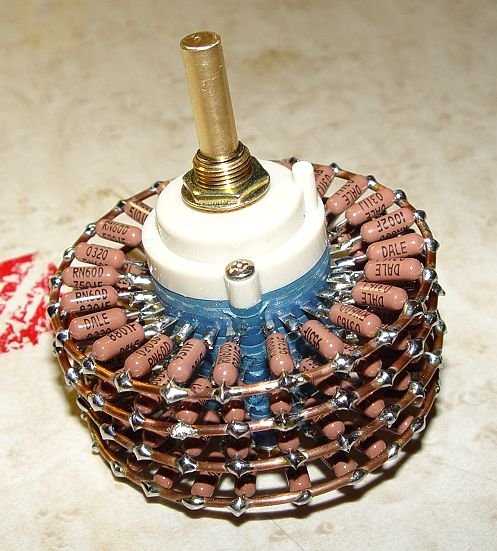
Thanks to Steven, now armed with the benefit of hindsight, I had to build the attenuator in a different way. If you scroll down the last JPEG on the excellent tutorial page, you’ll see there are a few other options suggested. Of note, is the last option, which is the most compact in size and construction. Hey hey hey! This is it!
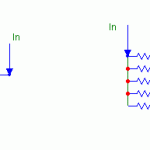
And this is how your wire it up.

Please note that Left and Right channels are split at the center. “In” is via the center 2 most terminals, followed by “Out” and GND at the outer ends. You will have to use those thick copper wires as ground.
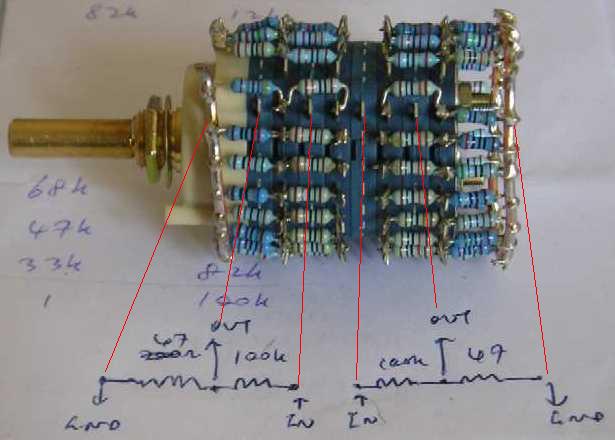
This method of construction is much simpler and you only need to work with 2 thick copper wires instead of 4. Plus, mistakes are easier to rectify. After building mine, one of the position was quiet. I checked and found that I got a wrong resistor there. Hmm… To correct it, just undo the solder connection and redo it. But if you followed the “stacked-up” construction as encouraged by the tutorial page, you’ll be stuck with desoldering lots of resistors!
There’s another plus point with this construction. You can be really really cheeky. Ever wondered how does Kiwame, Riken, tantalum, Holco blah blah blah resistors sound in your setup? Easy! Unless you have many amps with power ranging from 1W to 200W, most likely you will only use a couple of settings on your attenuator. The rest of the resistors are just… spectators. Yes! Use them! Say you find yourself using position #12 most of the time, which is, say, -24dB. Now you could go funky by removing all those resistors on positions #13 till say #16 and replacing them with equivalent -24dB resistor sets of Kiwame, Riken, tantalum and Holco. This way, it’s soooooo easy to compare their sound. Does this sound like a sound idea? It sure beats soldering/desoldering all the time!
If your purist friend balks at the idea, saying Kiwame has to go through “less of the switch” compared to Holco, well, you can always solder the resistors around in different locations. Or perhaps even mixing them (Dale with Riken? Kiwame with Holco?) for a “rojak” (mixed-up) sound? Then you can tell your friend, “I blended and mixed up their signature for a perfect blend that’s unique to my taste”. Hmm… Sounds like rolling your own cigar…
Okay, I have talked too much. I’ve built mine. It’s time you build YOURS.


xhming
xhming
xhming