Simple EL84 poweramp/integrated
I’m a simpleton when it comes to names.
The simple preamp using 5687 was named “Simple 5687”.
Now that we have a poweramp/integrated using EL84, it’s going to be called… “Simple EL84”.
I’m going to divert from conventions here. MY conventions.
This amp is push pull, not single ended. I like single ended better but it gets freaking expensive if you need more power. Push pulls, being more efficient, can do a hell lot more power. Besides, not everyone would want huge, coffin-like high sensitivity speakers in their living room right?
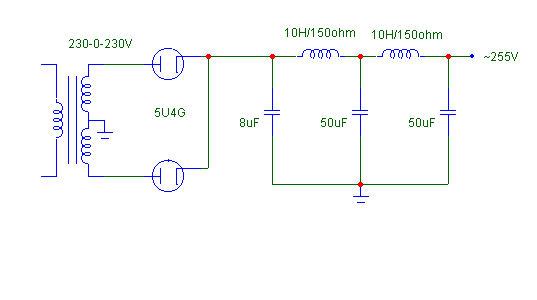
Also, using capacitor input power supply here, not choke input.
Using solid state diodes! (shrugs!) No tube rectifier here.


Musicians look at music scores and spend hours talking about it. DIYer wannabes spend hours looking at a circuit and days talking about it.
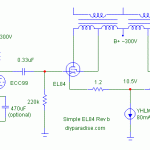
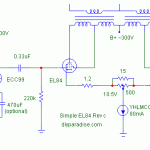
But this amp is more than your conventional push pull amps. You see, conventional push pull amps consist of at least 3 stages. Driver, phase splitter and power stages. This bugger here, has only 2 stages. Phase splitter and power stages are combined. The idea isn’t new (what else is under the sun?) and you can read about here… .
Notice some novelty here?
First of all, only one coupling cap per channel! Push pulls usually require a lot more! At least 4 pieces. 6 pieces are common too. Real pain if you want to upgrade all of them to Jensen paper in oils… But as there’s only 2 caps here, you can afford to splurge!
What else? No feedback! Usually push pull amps use feedback but none here. Actually there is some local feedback as there’s no cathode bypass caps but there’s definitely no global feedback here.
And? Simplicity! Looking at the schematics, it looks just “one tube extra” compared to 2-stages single ended designs. Very easy heh?
Lastly. If you believe all the audio diatribe about evil electrolytic caps. Look at the circuit again. No electrolytics in the signal path! (actually there is in the power supply but give me some leeway okay?)
The driver stage is sooooo simple that you can’t afford to take out any part! It’s simple as it is. Since the EL84 in this configuration needs less than 15V to swing to full power, if your source signal leve is 2V, this means you only need a gain of < 8x to drive it to full power. Gain of 8? You don’t need
expensive 12AX7 (gain of 100)
slightly cheaper but still damn expensive 12AU7. (gain of 40+)
move over, 6SN7, 6SL7…
In fact, you could use almost any tube! The design above shows JJ’s ECC99 as I have never used this tube but have heard lots of good things about it.
WAIT A MINUTE!
I have already built the Simple 5687 preamp. If you said that any tube can drive the EL84 to full power, can I just use it?
Of course! And this is the beauty of this design! If you have already built the Simple 5687, all you need to build for the power amp is this!

Or you could combine the 5687 driver stage and the EL84 power stage to make your own integrated amp. Cool huh? Life is so much fun when we have so many choices! You could build this with all modern tubes! JJ ECC99 driving JJ EL84. Or all NOS tubes! NOS 5687 driving NOS EL84.
But NOS EL84 aren’t cheap…
This is where DIY Paradise comes to your rescue again! EL84 is also known as 6BQ5. WE DON’T HAVE TO USE 6BQ5. We could use the 8V version, which is 8BQ5! (As I write this, some folks are going to curse me. The price of 8BQ5 is going up! Thanks to fellows like me…)The only difference being this guy needs 8V heaters as opposed to 6BQ5’s 6V heater. If you are going to DIY this amp, you have the flexibility of customizing your power transformer. So you could specify 8V heaters. No problem at all. Non-DIYers are tied by the available heater taps on their amps… DO NOT BE HANDICAPPED, fellow DIYers. Break free!
Does it end here? Not yet!
The circuit above is wired for ultra linear configuration. (~10W)
If you tie g2 to B+, you have pentode configuration. (~15W)
If you tie g2 to plate, you have triode configuration. (~5W)
In other words, once you built this amp, you can really really really anal, and wire a switch to switch between different modes. How’s this for 3 kind of sound in one package?
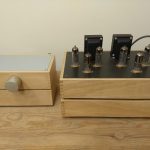
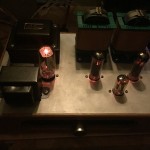
Oh well, and so I built the above amp with JJ ECC99 and NOS 8BQ5. Proceed to “Building the Simple EL84”.
Who is the author?
I like the idea of the switch to change mode of operation, but the valves would surely need a different OT for each.
hi david
i wrote the article above, as well as almost all the articles on this site.
you don’t need different optx, just optx with different tappings.
yeo
Hi, ive read your complete article, and want to build this schematic but i do not have ecc99…. I do have some ecc83, what resisters do i need to change to make it work with ecc83/12ax7?
hi needle
i won’t bother with ecc83.
if you want to use the 12a*7 series, use 12au7 or 12at7.
i’m afraid you’ll have to experiment with plate load resistors.
yeo
Hello Yeo
I like your design. Why are you using a 400ma power transformer ? It seems like a power transformer rated at 200ma should be more than sufficient for a stereo amplifier. Am I missing something? Thanks.
John
hi john
thanks for the kind words.
why 400ma? as you said, 200ma is sufficient but the sound is always better when using a bigger power transformer.
i believe this is because we based our 200ma rating on continuous current. music, however, could consists of sudden surge in current. so 200ma may not be sufficient to cater for such peak demands. hence twice the dc rating sounds better to my ears.
thx!
yeo