I know! It’s been a long while but I assure you the wait is worth it.
The culmination of all the hard work, experiments and listening tests of all the DIYers here! Most significant tweak has to be the “3 transistor mod” suggested by Paul Needs and Paul Hynes. Who would have thought we have such a bottleneck there? A major major upgrade in sonics in every way!
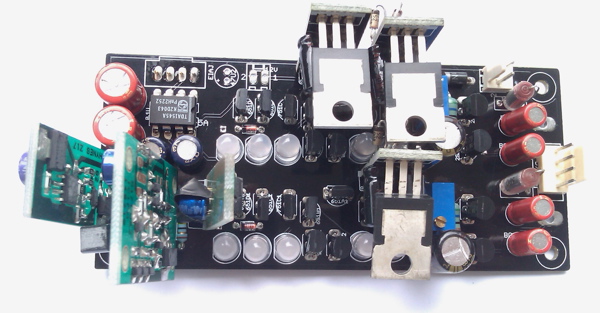
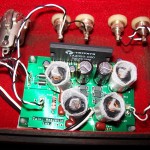
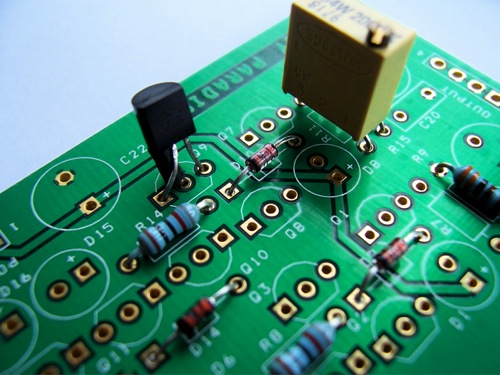
Shown here built up with the Paul Hynes regs and CCS2 plus 3 Audioslaves for the I/V stage.
Now offering mojo2 PCB.
Note that only one supply is needed as the PCB traces provide power to the individual regulators.
The PCB has been designed to fit Paul Hynes CCS2 and Regulators particularly the 5.4V and 0.83V regs. So no more string of diodes etc. If you prefer the simplicity of the original mojo, it is still being offered for sale. If you are budget conscious, you could build whichever reg you prefer and fit into mojo/mojo2.
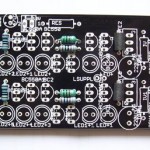
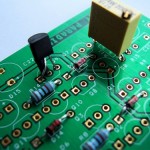
mojo2 kit.
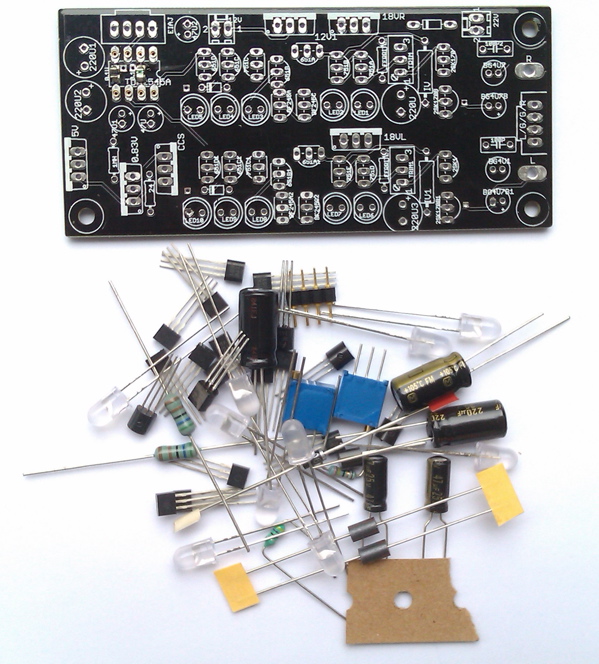
The kit has all the SMD components (resistors, capacitors and ferrite beads) soldered on so you only have to mess with the through hole components. [yes, thanks for the applause!]
It has everything you need except — regulators, Black Gates capacitors and output coupling capacitors. Oh yeah! Solder, elbow grease and the most precious commodity of all – time.
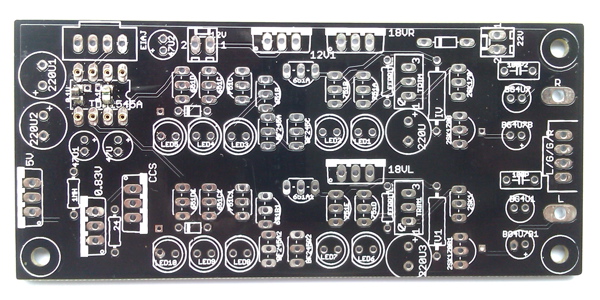
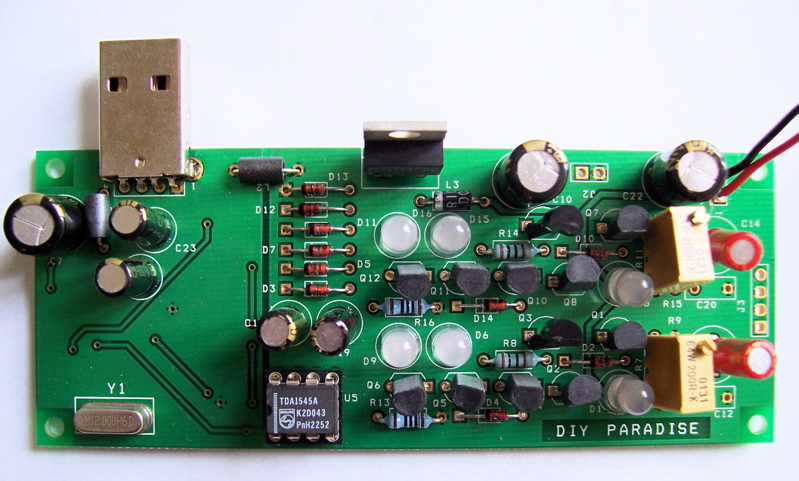
mojo2 map.
The map above shows CCS2/5v4/0p83 regulator pinouts.
If you fit in the Paul Hynes 5v4 regulator at “5V” location above, you only use Output and Ground.
If you are budget conscious, you could use Audioslave here or even a LM/LT1086-5V regulator as the pinout is the same – I, O and Gnd.
The rest of the regulators are straight forward.
The 12V and 18V regulators share the same pinout as the 5V reg, namely I, O and Gnd.
If you don’t want to use regulators here, just short I and O together but be careful with the CCS2 as it can’t take >17VDC.
However, due to the tight fit, the electrolytic capacitor of the CCS2 may come into contact with the solder joints on the 0.83V regulator, a simple suggestion of insulation tape on the top of the capacitor should do.
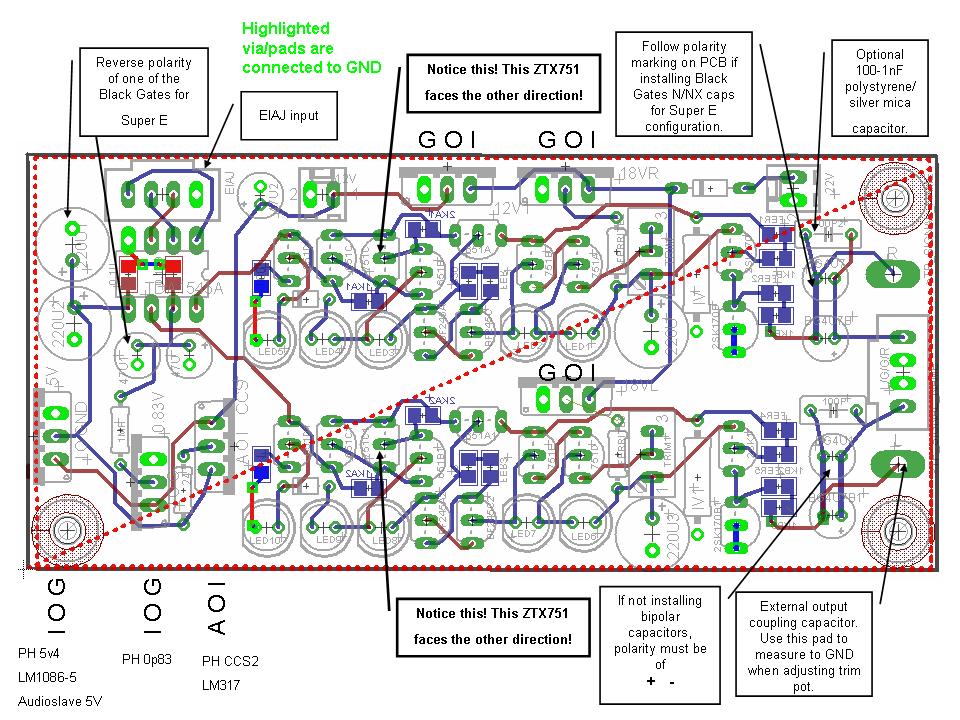
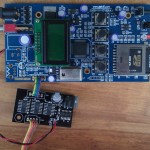
As mojo2 accepts EIAJ input, you could just feed EIAJ signal to it directly. Shown here is my current favourite digital player! Sounds best on a chopping board!
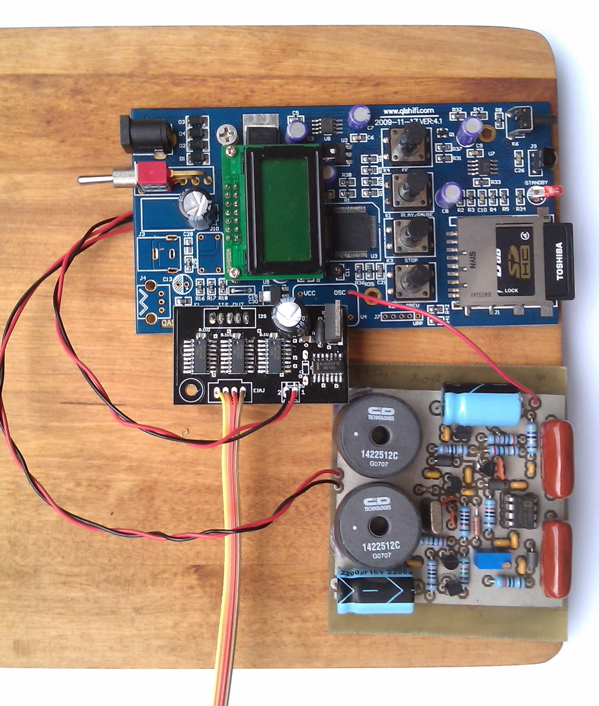
Though not shown, the ribbon cable feeds directly to the EIAJ input of mojo2.
The QA550 SD card WAV player reads bits and bytes directly from your SD card where a DSP chip does all the hard work here. This chip then outputs I2S signal to a CS8406 I2S to SPDIF convertor then outputs SPDIF downstream. This is where you hook up your DAC and let your digital receiver process this SPDIF and extracts I2S/EIAJ signal back to feed to your DAC chip.
Now, we could circumvent all this data processing and simplify it. All the attendant processing can’t be good for the signal no? Since there is already I2S signal onboard (straight from the DSP chip), we could feed to our I2S-DAC chip!
Monica’s TDA1545A requires EIAJ so here comes Black Crow! An I2S to EIAJ convertor board.
The above shows Black Crow’s pins directly mounted on the I2S pads of the QA550 which its designer very nicely provides us. The oscillator was also removed and now fed by a single supply version of a Kwak Clock 7. I’m too lazy to build one so I bought some DIYer’s version. [Thanks Patrick!]
So how’s the sound?
Going I2S is worth it! Installing the Kwak Clock (or some other low jitter design) pays off well!
Dare I say it?! Digital has never sounded so analog!

Hi Yeo
received the kits today, and miss the 1N4148 Diodes
No problem I have a few lying around
regards Tony
hi tony
sorry about this mistake i made in the bom list.
will update in future list. thx for your understanding.
yeo